
While you could login to your DigitalOcean servers with a password, it’s usually preferable to set up and use an SSH key pair. SSH keys are generally considered more secure than passwords and are convenient in that you don’t have to remember long and complicated passwords. I have also found, when connecting remotely to my DigitalOcean droplets with third-party tools like FileZilla that logging in with a password created problems on my server and I would end up with weird errors.
To use an SSH key with your DigitalOcean account you’ll first have to generate one. For that, if you’re on Windows, you’ll want to download and install PuTTY.
On the PuTTY download page, you’ll want to download the MSI(‘Windows Installer’) file that matches your operating system, either 32-bit or 64-bit. Once that’s done, install PuTTY on your computer by double clicking on the downloaded file and using the installation wizard.
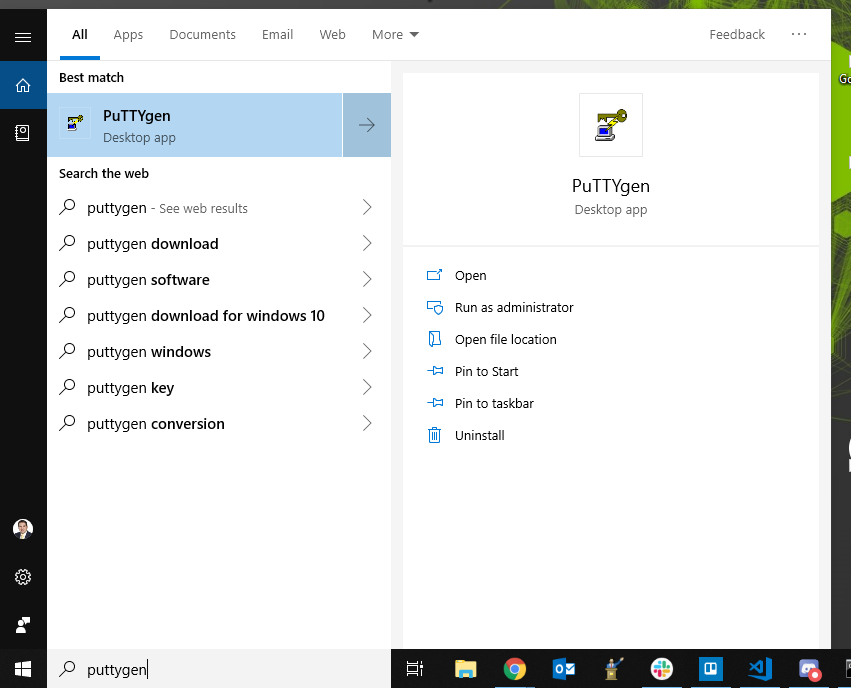
Next, run the PuTTYgen program by tapping the Windows key and typing puttygen.
The key generator is very simple and everything is already configured properly for our purposes, so there is no need to change any of the settings. All that is needed is for you to click on the Generate button on the right-hand side.
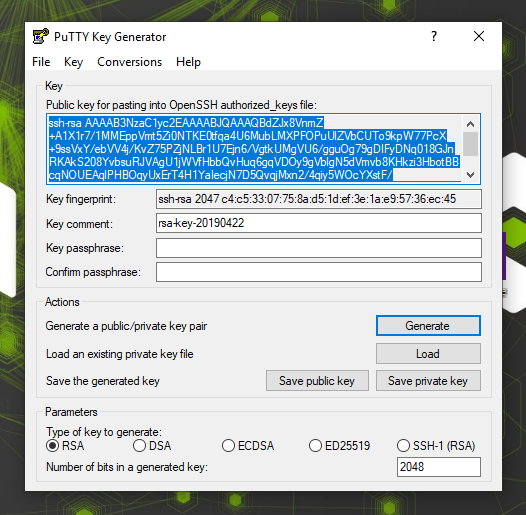
Once the key has been generated, copy the entire public key text into you clipboard (Ctrl-C or right-click + Copy). Don't forget to also click the Save private key button and save it as a .ppk file on your computer. You can name it whatever you want.
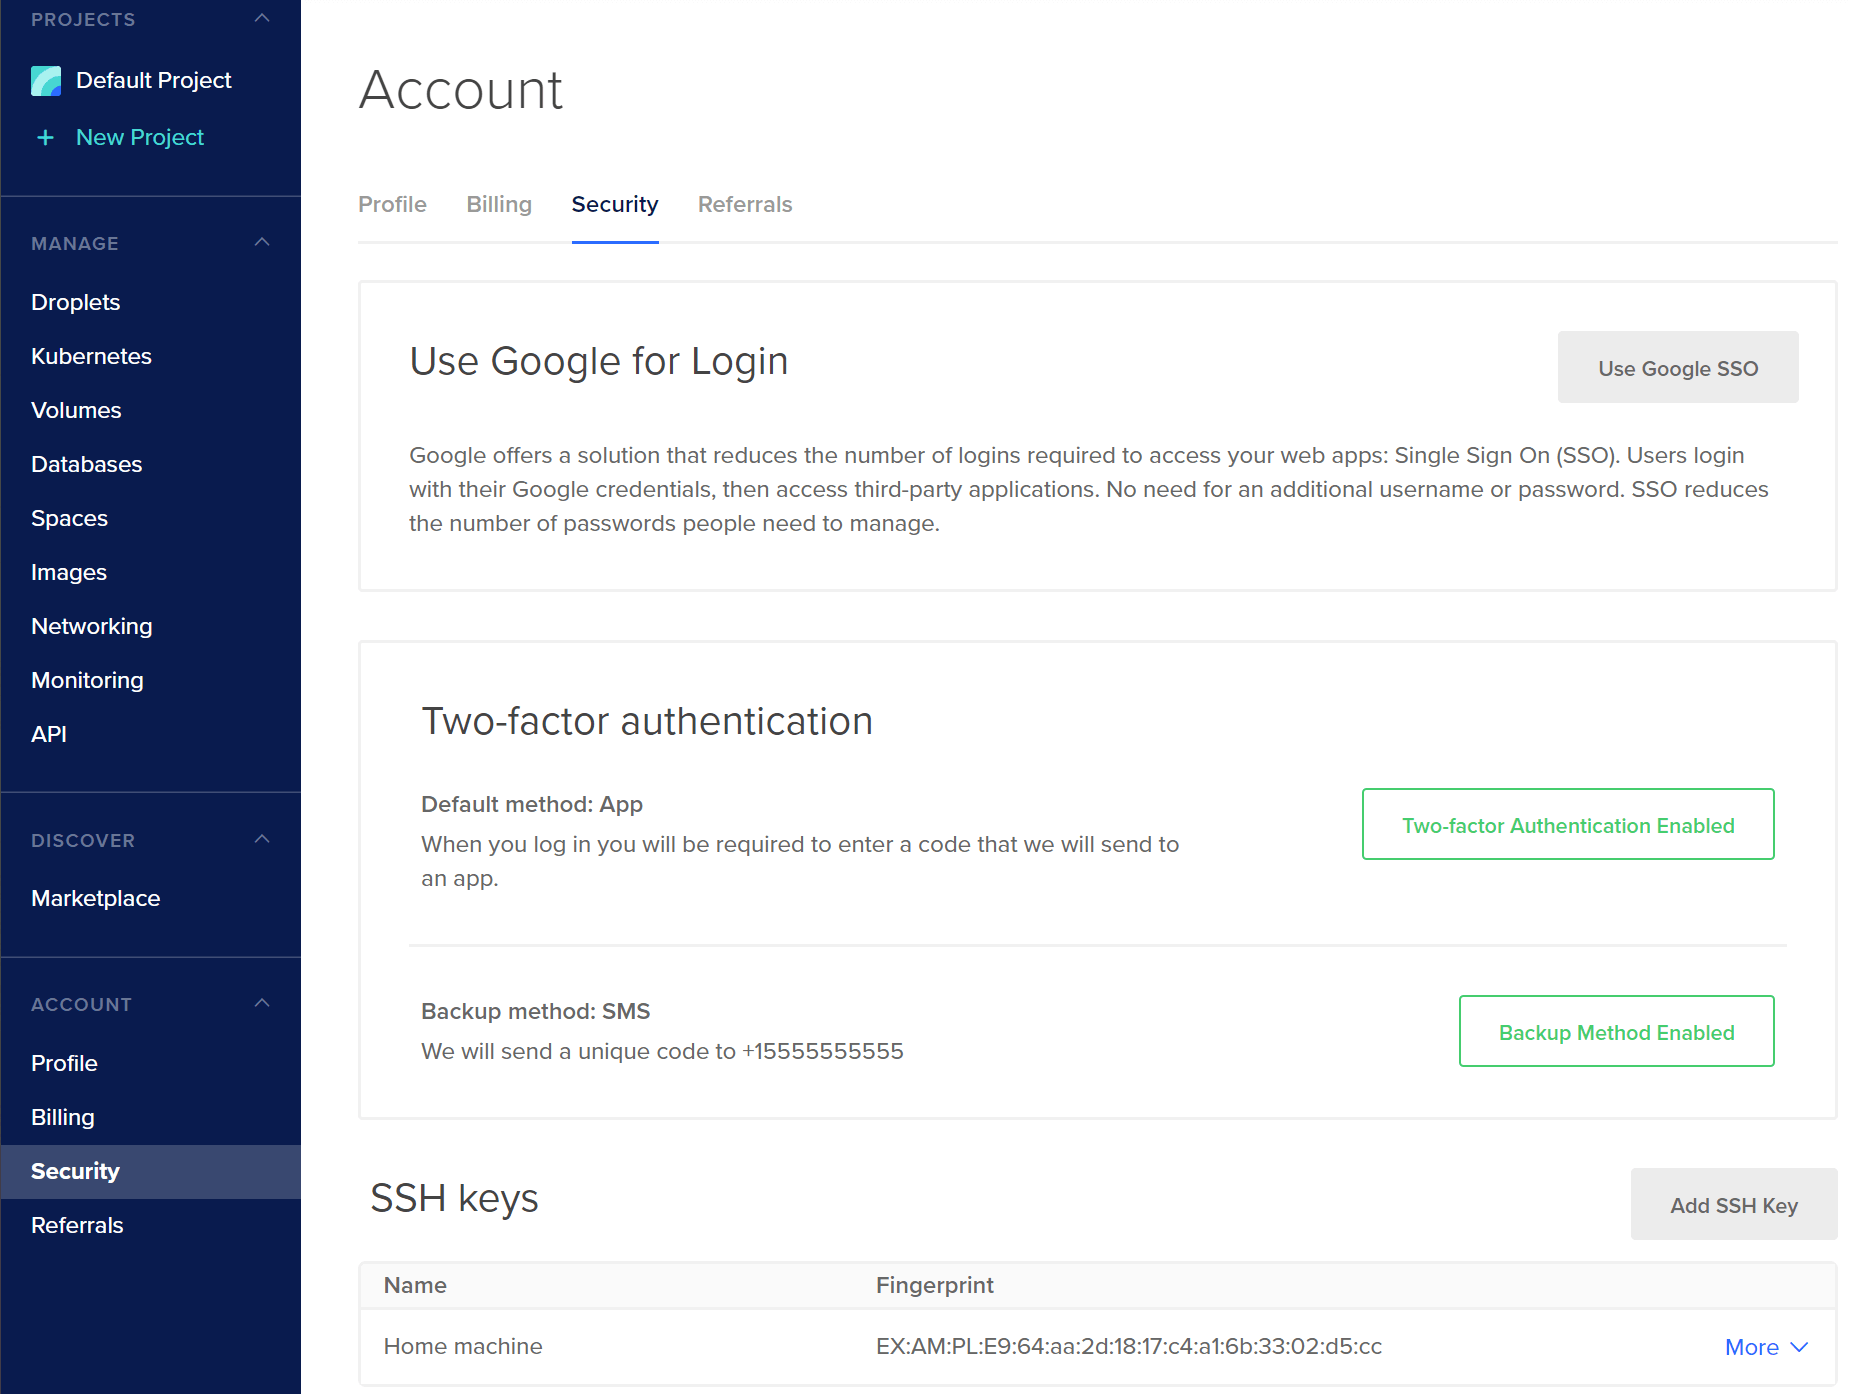
Next, you'll want to login to your DigitalOcean account and click on Security in the Account section in the navigation menu on the left-hand side. In the SSH keys section, click on Add SSH Key.
Now simply paste (Ctrl+V or right-click+Paste) your public key into the SSH key content field. In the field just below, enter the name of your machine or any name you want really.
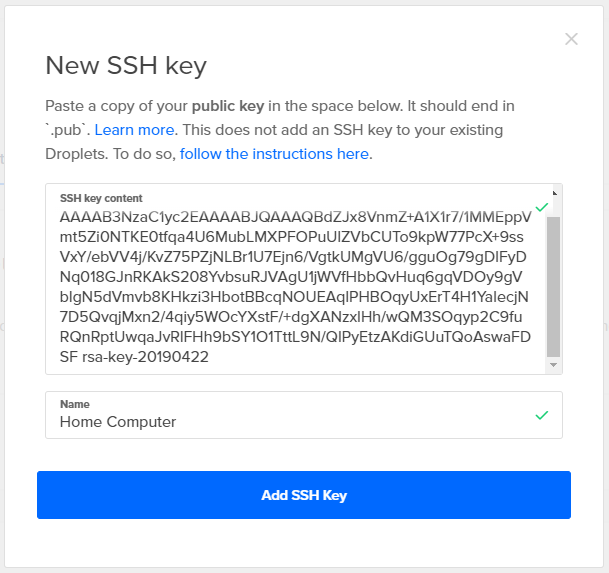
All that is left for you to do is click the Add SSH Key button and you're in business. Now, every time you create a new Droplet, you'll be able to automatically add this key.


Comments